
Hiking the Narrows Without the Crowds (Top Down)
The Narrows was truly one of the most spectacular and unique hikes we’ve ever done. Between the epic canyon views, the perfect weather, and the utter lack of human presence on the Top Down trail, it was absolute bliss. I’ll break down everything you need to know about which route to take to maximize enjoyment and minimize crowds.
WHAT IS THE NARROWS?
The Narrows is a gorgeous slot canyon hike in Utah’s Zion National Park. You hike alongside (and inevitably, in) the Virgin River. You will often wade through the water on slippery rocks, so it’s important to have the right equipment.

TWO ROUTES, THREE OPTIONS
There are two primary routes to hike the Narrows.
The grand majority of visitors will hike the Narrows Bottom Up, starting at the Temple of Sinawava, hiking as far as you’d like up to Big Spring, and turning around to venture back the same way you came. This is the easiest option both logistically and physically, as you can choose to turn around at any time and you don’t need a permit to hike this route. The downside is it tends to be very crowded.
My strong recommendation is to hike the Narrows Top Down, starting at Chamberlain’s Ranch and finishing at the Temple of Sinawava (the same location you start and end at doing Bottom Up). The National Park Service website lists this as a 16 mile hike, but the ranger at the Wilderness Desk at the Visitor Center explained that that distance is the length of the river. Since the hike involves weaving back and forth to either side of the bank, the total hiking distance is more like 20-25 miles. We personally logged 24 miles.
There are two ways to do the Top Down Hike, both of which require a permit. You can do the hike as a day-hike or you can camp at one of the 12 campsites overnight. We originally planned to attempt this as a day hike, but after talking with the Wilderness Desk, we opted for an overnight stay, and are so glad we did. The view of the stars at night was magical, and we were able to take our time and soak in the gorgeous scenery with next to no crowds. We highly recommend camping overnight and attempting the hike Top Down.
HOW TO GET THERE?
To get to Zion National Park, I recommend flying into the Harry Reid International Airport in Las Vegas, Nevada and driving 2 hours 45 minutes to the park.
If you’re completing the hike Top Down, you’ll need to reserve a shuttle to transport you to the starting point of the hike: Chamberlain’s Ranch. We reserved ours with Red Rock Shuttle. The shuttle takes 90 minutes to get from the flagpole at the Visitor Center (the meeting point) to the starting point of the hike. If you’re doing the hike in one day, you really need to be on the 6am shuttle. Since we had two days to complete the hike, we opted for the 9:30am shuttle.
The guide at the Wilderness Desk warned us that the Visitor Center parking lot fills up by 8am. We got there at 7:30am to find a spot and got breakfast at the grocery store nearby to fill the time.
To get back from the end point of the hike (for both Bottom Up and Top Down) at the Temple of Sinawava, you can use the free shuttles to get back to the parking lot.
Be sure to check the schedule to find the last shuttle time for your hiking date. It’s important that you don’t miss the shuttle, otherwise you’ll be walking back in the dark to the parking lot, which the park advertises as a 7.7 miles walk taking 2 hours 45 minutes. Adding another 7 miles to a 20-25 mile hike is the last thing you’ll want to do. We hiked in October, so the last shuttle departed at 7:15pm.
WHERE TO STAY
We stayed in Zion National Park for 3 nights and 3 days. We stayed at Zion Ponderosa for the first 2 nights, which is conveniently located inside the park and very close to the shuttle for the Observation Point hike we did the first day. (Observation Point is very close to the famous Angel’s Landing as well). Zion Ponderosa is a 45 minute drive from the Visitor Center, however, which is where the shuttles for the Narrows hike will pick you up.
We camped for our last night in the Narrows.
The Top Down hike starts at 6,600 feet of elevation above sea level. I highly recommend getting to Zion National Park 2 nights before your hike, so you can acclimatize to the altitude and pick up your permits at the Wilderness desk the day before your hike.
WHEN TO GO
The absolute best time to go (in my opinion) is September and early to mid October. We did the hike October 13-14 and had perfect conditions. The one downside is that the days are slightly shorter in the fall than the summer, so the last shuttle out from the Temple of Sinawava is earlier in the day, leaving less time for the hike.
The summer months are great, especially with long daylight hours and warmer water temperatures, but with perfect conditions come crowds.
It’s very hard to reliably plan to hike the Narrows in the winter, as winter brings cold water and high water levels, especially as the snow melts in the spring. If you plan to hike in the spring, don’t plan your trip before the end of May or June.
HOW TO GET A PERMIT
To hike the Narrows Top Down, you will need to secure a permit in advance. You can obtain an Overnight permit or a Day Hike permit. A permit is not required for the Bottom Up hike.
Permits are released 4 times a year at 10am MT and, depending on the season, they go quickly. I highly recommend setting an alarm for your desired time and booking as soon as the reservation opens.
Here is the date schedule:
- Hiking Jan 1 - March 31: Permits available December 5
- Hiking April 1 - June 30: Permits available March 5
- Hiking July 1 - September 30: Permits available June 5
- Hiking October 1 - December 31: Permits available September 5
Even though you reserve the permits online, you have to pick them up in person and discuss your hiking plan with a guide at the Wilderness Desk of the Zion National Park Visitor Center the day before. We had to postpone our hike because we didn’t realize this, and weren’t in town by 5pm the day before the hike when the desk closed.
If you can’t secure a permit, you might be tempted to try to do the hike without one. I highly recommend against this. You get all essential tips and safety/weather checks talking to the Wilderness Desk. In addition, most camp sites are small and private, so you can’t just camp without a secured spot. Furthermore, you will need a shuttle to get to the hike start point and they will check your permits. Lastly, your license plate will be registered with the park and will be removed at night if the plate is not registered with an active overnight hiker.
DO I NEED A GUIDE?
You do not need a guide for this hike. It’s practically impossible to get lost, as you just follow the river through the canyon.
SAFETY CONSIDERATIONS
There are a number of safety precautions you should take before hiking the Narrows.
First, make sure to monitor the water current, which fluctuates day to day. When the current is below 70 cubic feet per second, the hike is considered only moderately difficult, but the difficulty level increases as the current increases. At 150 CFS or above, the park will close the Narrows.
The Narrows is also prone to flash floods, which can be very dangerous conditions for hikers. The National Park Service website recommends monitoring flash flood warnings on this page, but you’ll also have to visit the Wilderness Desk at the Visitor Center the night before the hike, so you can chat to them about any potential weather concerns for the day of your hike.
The National Park Service also warns you to bring plenty of water on the hike. They have found toxic cyanobacteria in the river, which means it is not safe to drink the water even if you use purification tablets (except from Big Spring, located after campsite 12).
Lastly, the water is cold. Ensure you have the proper gear, including drysuits when necessary, to do this hike. Hikers without proper gear have succumbed to hypothermia in the past.
DO I NEED SPECIAL GEAR?
We rented canyoneering boots, Neoprene socks, wooden walking sticks, and drysuits from Zion Guru. They outfit people for this hike daily year-round, so they were able to make recommendations on if we should rent a dry bib or a drysuit. You have the option to rent gear for 1 day or 2.
For camping, we bought sleeping bags and sleeping pads at Zion Outdoor. It’s a small shop with a limited supply, and it’s quite expensive. The nearest alternative was a Walmart 45 minutes away.
HOW TO CAMP
When you make the permit reservation for the Overnight Top Down Narrows, you will select a campsite. There are 12 campsites, most of which are private (only for you and your group) and a few of which are large enough to accommodate multiple groups.
I recommend selecting a campsite in the middle of the list (ideally sites 4-8). You want your hiking distance to be relatively balanced over the two days. In particular I recommend against selecting one of the last few campsites as you might be scrambling to make it to your campsite before dark on day 1. All campsites are structured so that you hike slightly more on Day 1 than Day 2, so it’s okay to get one of the first campsites if that’s what is available. You can refer to this map to see where the campsites are and which ones are available for online reservations. The reservation system will also have distances for Day 1 and Day 2 listed when you click on each campsite.
The campsites are numbered, but they can be hard to miss, so we recommend building in some extra time into your plans to ensure you have enough time to find the site and set up your gear while there’s still daylight.
We had not planned on camping overnight originally so we scrambled to buy gear last minute. The guide at the Wilderness Desk told us we didn’t need tents, and that we would be fine if we purchased sleeping bags and sleeping pads. We thought it was magical camping directly under the stars, and were plenty warm and comfortable with the gear we had. Our campsite (number 8) was on a sandy patch that was partially covered under rock, so it was quite cozy.
OUR EXPERIENCE
Our original plan was to hike the Narrows Top Down in a single day on a Saturday. Those plans fell through when we realized we needed to pick up the permits in person the night before the hike to discuss safety protocols and we wouldn’t make it to the Zion Visitor Center before it closed at 5pm.
Plan B was to hike it in a single day on Sunday, but after talking with the employee at the Wilderness Desk we quickly pivoted again to Plan C. He told us that hiking in a single day would be very strenuous and stressful, and made a strong recommendation to switch our permits to the overnight ones, especially given my recent POTS diagnosis would mean I was moving slower than usual.
We spent the remainder of the day frantically running around town securing drysuits and walking sticks and purchasing sleeping bags, sleeping pads, snacks, water purification tablets, and everything else we would need for the journey. Alex hadn’t brought an overnight backpack, so he made do with a tiny daypack and strapped a bunch of gear to the outside.

We elected to take Red Rock Shuttle’s 9:30am shuttle to the trailhead, which took about an hour and a half. Then we were off to the races!
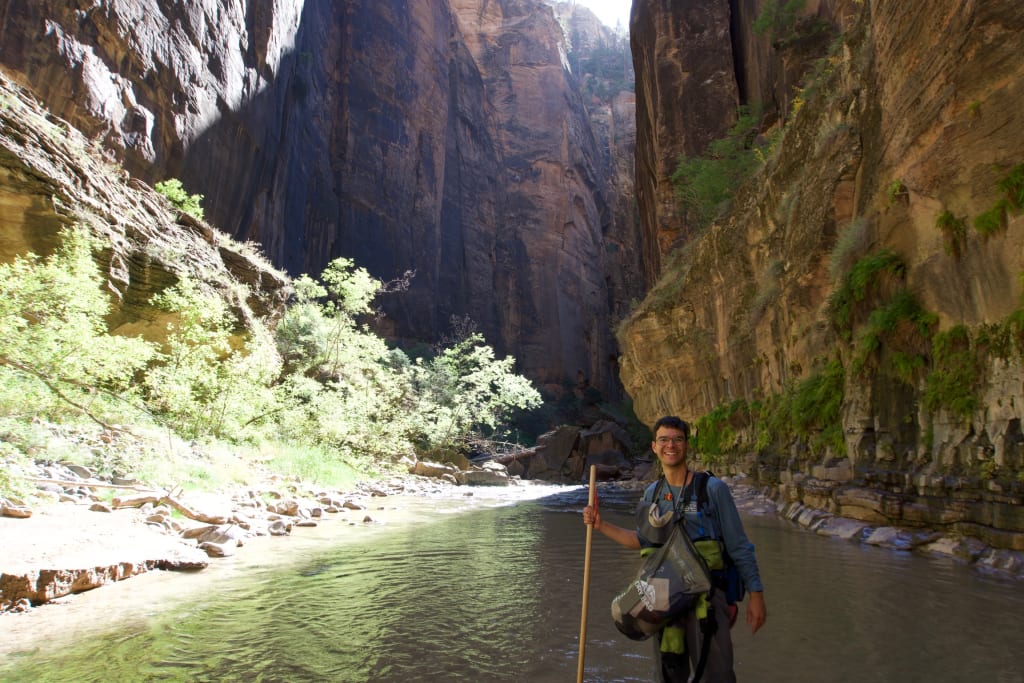
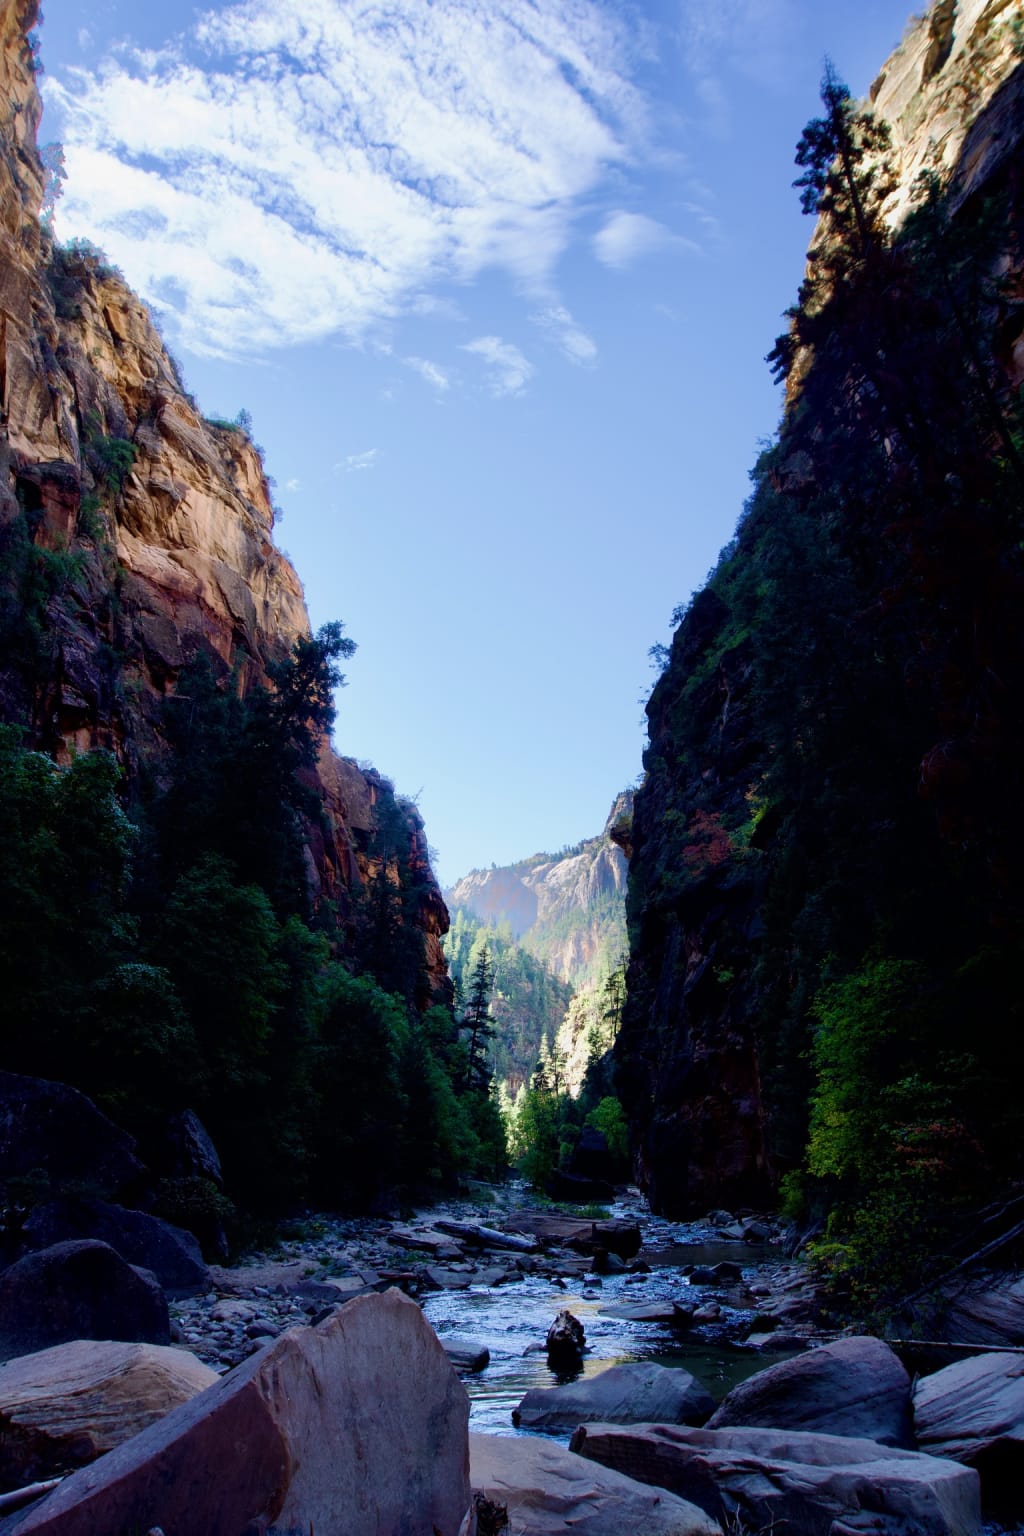
The first few miles were on a traditional trail outside the canyon. The only other hikers were those that came on our shuttle. After about an hour, the group naturally dispersed as we hiked at our own pace, and we entered the canyon.
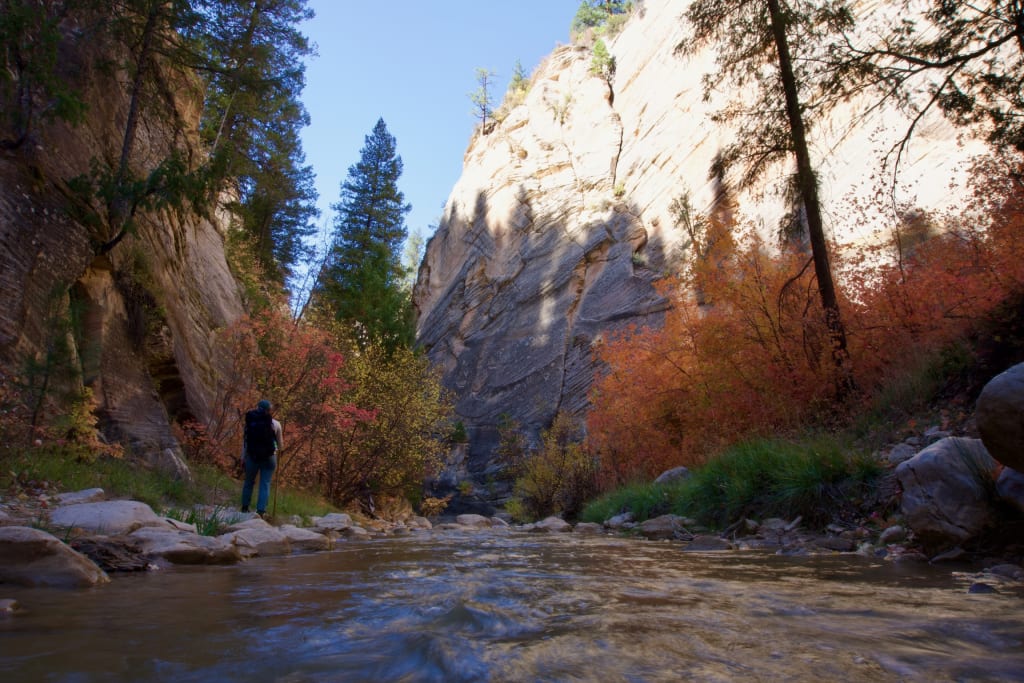
At first, the canyon is quite wide and short, with lots of trees around and very shallow water. The water stayed shallow the entire first day and we barely ran into 10 other people. It was so peaceful and awe-inspiring.

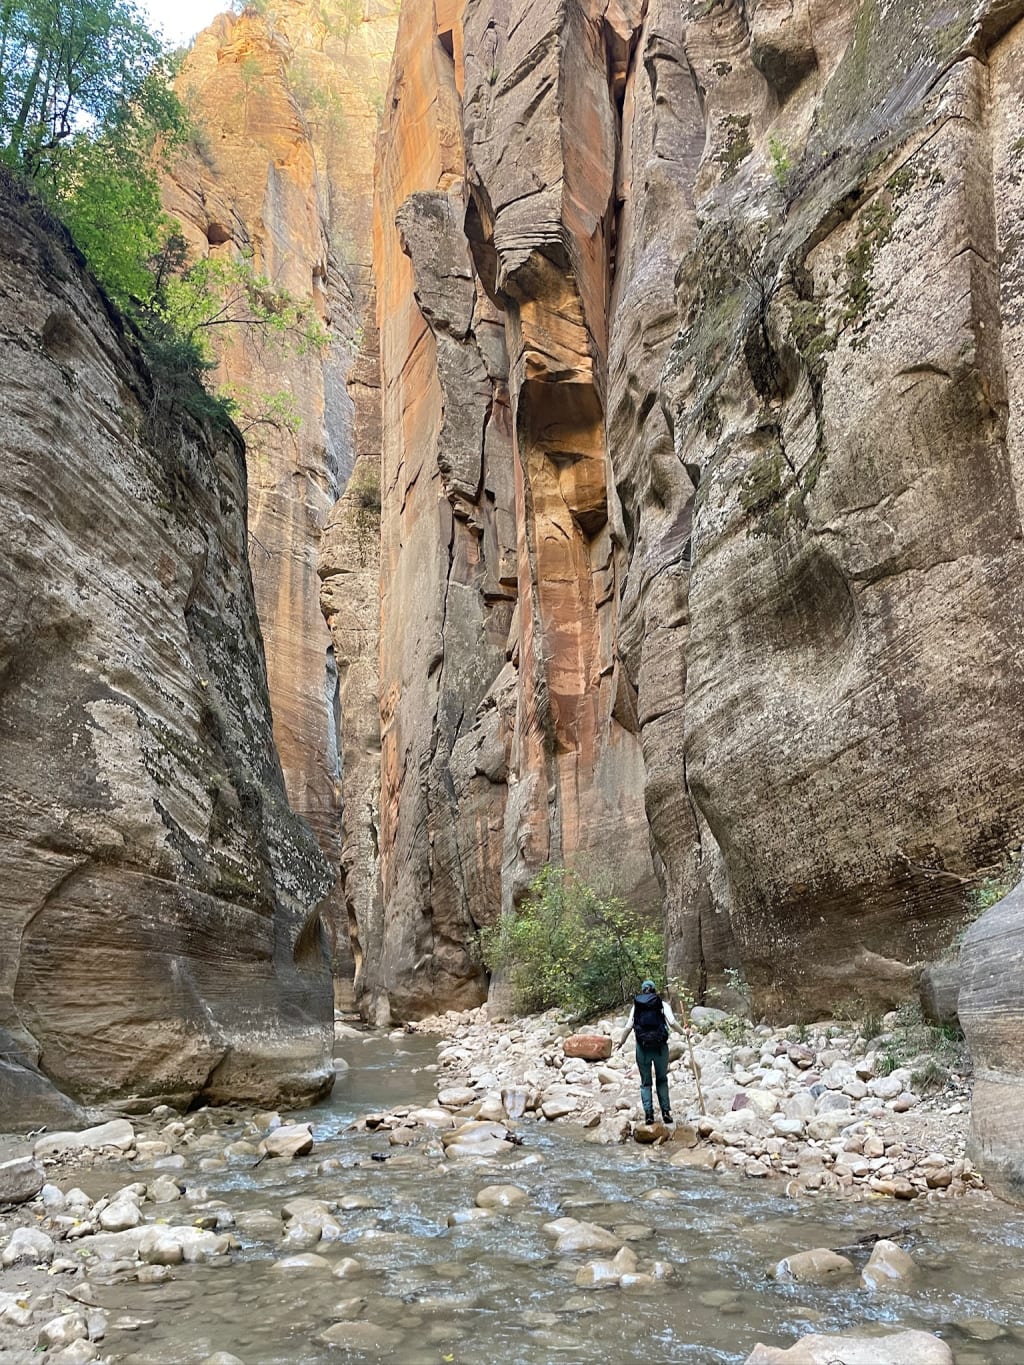
For the first half of the first day, it was pretty easy to avoid walking directly in the river, and we constantly crossed back and forth to walk to larger banks on either side. As the canyon narrowed, however, we were forced to walk directly in the Virgin River. The main challenge was walking along the giant rocks at the bottom of the River, which really slowed us down.
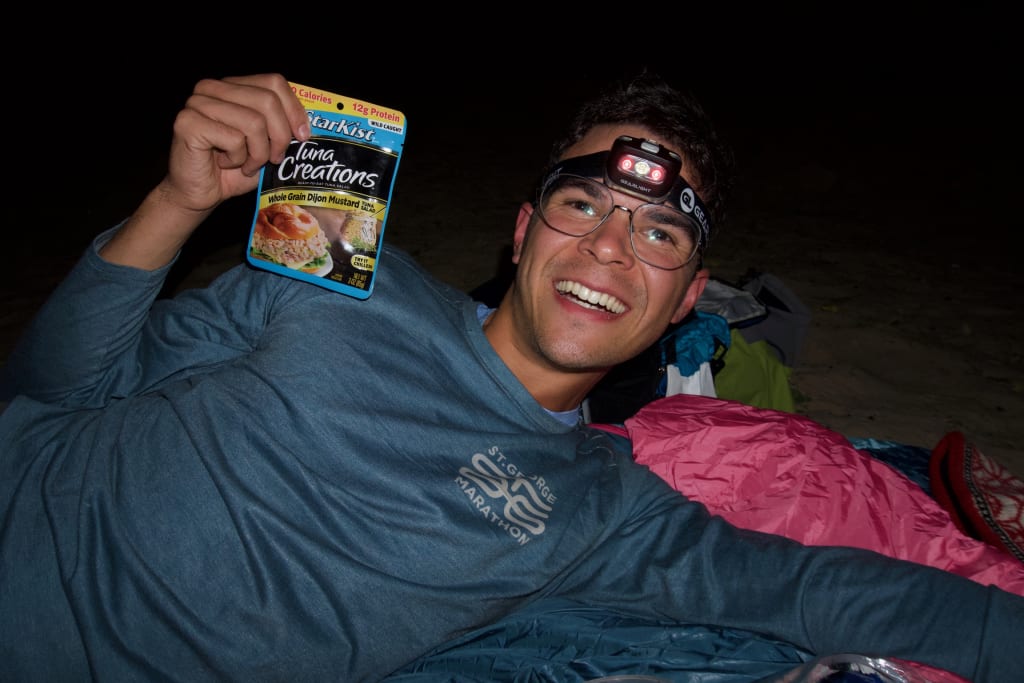
We took our time and stopped for photos and snack breaks, and barely made it to our campsite (number 8) before the sunset. We heard other hikers pass our site shortly afterwards in the dark.
Our campsite was a private, secluded, sandy patch a short walk away from the river. There are signs by the river denoting the campsites, but we walked by ours a number of times by accident. It was just large enough for two people to comfortably set up camp. Since we made these arrangements last minute, we took the guide at the Wilderness Desk’s advice to camp without a tent, and loved sleeping right under the stars.

We woke up bright and early on Day 2. The sleep quality was better than expected. We made our way past the last campsite, number 12, to Big Springs, where we could refill our water. This was where we encountered our first hiker doing the Narrows from the other direction: Bottom Up.


These hikers had braved the deep stretches that were to come. There were just a handful of sections that were waist deep or higher, and none that lasted for more than a minute’s swim.

Day 2 is where the drysuit came in handy, and we zipped it all the way up to make it across the water. The current was pretty strong, so all we had to do was float. It was an odd sensation walking into the water with all our camping gear and our backpacks got absolutely soaked. You could feel the ice cold water through the drysuit, but it kept us safe and warm. I couldn’t believe I saw a hiker attempt this in shorts. It was practically suicidal!
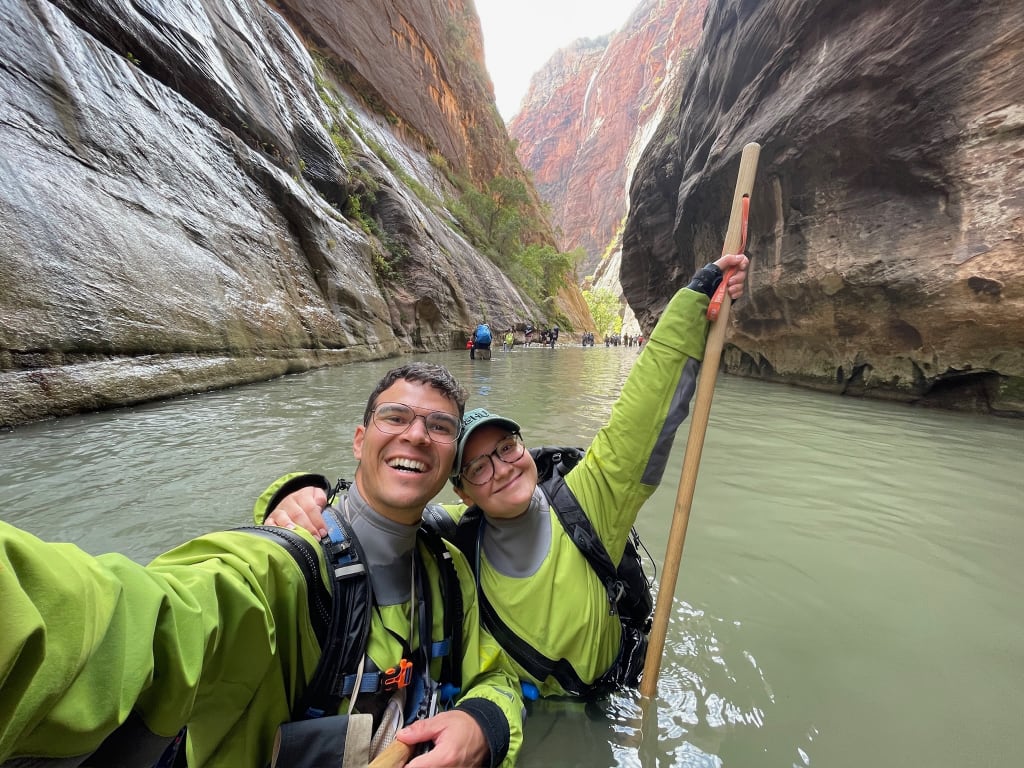
After the last of the deep water stretches was where we encountered the hoards of tourists. We quickly realized that we would not have had anything resembling the incredible experience we had had we decided to do the hike Bottom Up. At times, we felt like we were at the water park in Disney.
We made it to the Temple of Sinawava mid-day with plenty of time to spare. There were long lines waiting for the shuttle back to the Visitor Center, but they moved quickly.
Our watches reported an incredible 24 miles total hiked between the 2 days.
IS IT WORTH IT?
Without question, this hike is worth the effort and the cost. It was one of our favorite hikes of all time, and better still one of our favorite travel experiences of all time. It felt like we were in a dream having such a gorgeous place mostly to ourselves.
FAQS
What should I pack?
- Gear for camping: sleeping bag and sleeping pad
- Rented gear: hiking sticks, special boots, neoprene socks, dry suits
- Food (we stocked up on snacks from the grocery store, including protein bars, coconut chips, pumpkin seeds, almonds, dry roasted chickpeas & edamame, etc.) You should have a strong breakfast before you leave and bring enough food for lunch, dinner, breakfast on day 2, and lunch on day 2.
- Water (3-4L)
- Water purification tablets (just in case)
- Headlamp
- Dry bag
- Camera (this should stay in the dry bag)
- Power bank (this should stay in the dry bag)
- Permit (this should also stay in the dry bag)
- Toilet paper (this should also stay in the dry bag)
- Hand sanitizer
- Wag bags
- Ziplock bags for trash
- First aid kit
- LMNT
- Eye mask
- Dry clothes to sleep in (including dry socks)
- Down jacket to sleep in
- Warm hat to sleep in
- Change of clothes for Day 2
- Sunscreen
- Sunglasses
- Baseball cap
- Any medicine you might need (Advil, etc)
If you’re renting a car to leave at the Visitor Center, leave a change of dry clothes in the car for your return
How will I keep my gear dry?
I recommend bringing a dry bag for your valuables and essentials that can’t get wet, such as phones, cameras, permits, toilet paper, etc. Rest assured, the water levels don’t get any higher than knee-high on Day 1 of the hike, so your camping gear will be safe. On Day 2, there will be a few times you need to swim for short distances. Your sleeping bag will inevitably get wet, but you won’t need it anymore. Make sure to dry it out once you get back from the hike.
How deep does the water get?
The water was relatively shallow on Day 1 and never went above my knees. On Day 2, there were short spurts where we needed to swim (or float with the current). These short sections were less than 1 minute of swimming.
Do you need to be a strong swimmer?
Not really. You’ll be carried by the current and float if you have a dry suit on. The sections where you need to swim are also quite short, but it’s imperative that you’re at least comfortable with being in the water and not being able to touch the riverbed for a few seconds at a time.
Do I need a dry suit?
Yes, depending on the season, you will need a dry suit. Hiking without the proper gear can be fatal; you can get hypothermia. I highly recommend renting gear from the outfitters in the area (such as Zion Guru). They dress people for this hike every day and will be able to make great recommendations about whether you need a dry bib (lighter) or a dry suit (heavier) based on the weather forecast.
Is it strenuous?
The hike itself is pretty flat, but it’s very long and the terrain is pretty uneven. You’ll be walking over rocks in the river for a large portion of the hike. You’ll be pretty exhausted by the end, but it’s manageable for hikers in good shape.
Is there wildlife you have to worry about when camping?
There are deer in the Narrows, which of course are of no concern. The guide at the Wilderness Desk also told us there are mice, so we should keep any food in our bag elevated in the trees while we sleep. However, we had no issues and saw no mice.
How much does it cost?
Admittedly, due to the gear needed for this hike and the remote location, this hike is pricey. You’ll need to pay the park entrance fee ($35 per vehicle), obtain a permit to do the Narrows Top Down ($20 per permit + $7 per person to overnight or $6 per permit + $10 per person for the Day Hike), rent gear (we spent $82 per person for a 2 day rental), and pay for the shuttle to Chamberlain’s Ranch ($60 per person). You can see the latest permit prices here.
If you visit multiple national parks per year, I recommend purchasing the America the Beautiful Pass, which is $80 to visit all national parks for the entire year.
Is it safe to drink the water?
There is only one site along the Narrows where it’s safe to drink the water: Big Springs, where fresh water flows into the river from the canyon walls. It’s located after campsite 12, so you’ll encounter this on Day 2 of the hike. I recommend bringing water purification tablets just in case, and bring 3-4L of water with you for the first day and a half of hiking.
The National Park Service warns that they have found toxic cyanobacteria in the river, which means it is not safe to drink the water in the river even if you use purification tablets. The only place to safely obtain water is at Big Springs, where the water is flowing off the canyon walls.
What is the bathroom situation?
At Chamberlain’s Ranch, the starting point of the hike, there is a (very stinky) bathroom you can use before you begin the hike. Along the hike, you are advised to pee directly in the river. They specifically warn against urinating near your camp site, as it will make the campsites smell. If you need to poop, you will need to carry your waste out with you in wag bags. Since there are so few hikers that do the hike Top Down, it’s easy to find a secluded spot to do your business. It’s essential that you bring toilet paper, hand sanitizer, and wag bags on the hike.
On Day 2 of the hike, it gets very crowded once you pass Big Springs. There will be many people, and very few places to step aside to do your business. I would recommend taking a bathroom break before you get to this spot, and plan to hold it for a few hours until you reach the end of the hike.
Are there tight spaces to crawl through? Is it claustrophobic?
No, there are no tight spaces to crawl through.
Do phones have service?
No, I would plan on not having service for the grand majority of the hike.
How crowded is the Narrows?
Candidly, the Bottom Up hike resembles the water park at Disney. It’s very crowded. The Top Down hike, by contrast, is very peaceful. We encountered a total of maybe 8 people on the entire first day, and had the canyon to ourselves for the grand majority of the hike.
What happens if you get hurt or don’t make the last shuttle?
If you get hurt, alert another hiker passing by, and make sure to carry a first aid kit with you. If you miss the last shuttle, the guide at the Wilderness Desk told me they won’t come looking for you. You will have to walk 7.7 miles back to the Visitor Center.
Are the Narrows open year round?
In theory, yes, but the park will close the hike often in the winter and spring especially. The Narrows will close if the water current is above 150 cubic feet per second or if there is a flash flood warning. It’s very hard to reliably hike the Narrows in the winter or spring, as winter brings cold water and high water levels, especially as the snow melts in the spring. If you plan to hike in the spring, don’t plan your trip before the end of May or June.